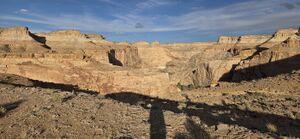
Gem Canyon (Middle Fork)
| Rating: | |||||||||||||||||||||||||||||||
|---|---|---|---|---|---|---|---|---|---|---|---|---|---|---|---|---|---|---|---|---|---|---|---|---|---|---|---|---|---|---|---|
| | Difficulty:3A IV (v3a1 IV) Raps:3-5, max ↨195ft
Red Tape:No permit required Shuttle:Optional 16mi Vehicle:4WD - Very High Clearance Rock type:sandstone | ||||||||||||||||||||||||||||||
| Start: | |||||||||||||||||||||||||||||||
| Parking: | |||||||||||||||||||||||||||||||
| Shuttle: | |||||||||||||||||||||||||||||||
| Condition Reports: | 11 Apr 2026
"This canyon is more of a grand adventure across the swell rather than a focused canyon trip. We parked at the west rim trailhead the night before, and |
||||||||||||||||||||||||||||||
| Best season: | spring, fall
|
||||||||||||||||||||||||||||||
| Regions: | |||||||||||||||||||||||||||||||
Introduction
Apr 2026 update
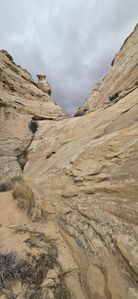
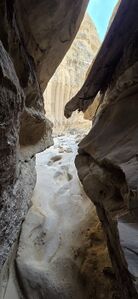
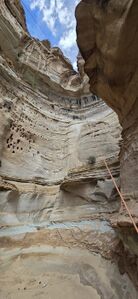
The Middle Fork of Gem Canyon is a good canyon that is hard to recommend. Bighorn Falls is a gorgeous two-tier dryfall. There are lots of downclimbs in some pretty narrows and the scenery in this remote western part of San Rafael Swell is quite spectacular. The towering walls carved by Muddy Creek on the return in either direction are a treat.
The pay-to-play, however is the issue. The approach and return are long. The canyon has several discontinuous sections trudging through sandy washes. Even the shortest shuttle is long and utilizes old faint roads requiring more capable vehicles.
Canyon stats (distance, times) based on the West Rim TH Shuttle exit.
Summitpost Beta
Note On Source Info
Information in the following sections is based on the many Summit Post write ups for this and other nearby canyons (linked in the "Beta Sites" section). The Summit Post write ups are great; but, since there are numerous pages on Summit Post for this and the other canyons in the area--all of which share some route components--it can be a lot of work to sort through all the Post pages to distill the necessary beta. An effort was made here to compile that information presented by the first descent parties while also providing edits and some expanded information. Hopefully this will make it simpler for future canyoneers to distill the beta needed to descend this and other nearby canyons. That being said, the Summit Post pages are absolutely worth a read and contain many excellent photos.
Please note that this information, while hopefully adding some clarity, is still early beta and should not be misconstrued as turn-by-turn directions. Because this canyon is very infrequently descended the beta could be wrong or outdated. Please use good judgement when using it.
Approach
Apr 2026 update
Drive south on Willow Springs Wash (CR923) from exit 108 on I-70 for 5.3 miles to a triangle junction.
To set the return shuttle at the West Rim TH, continue right/south on Willow Springs Wash Rd, driving across several washes and over Muddy Creek on a bridge. Turn East at 38.73241, -111.12885 onto a faint two-track that becomes more defined. This turn would be easy to miss without a GPS. The next road further to the south is better until it isn't and contains a steeper section that most will want to avoid. Both of these roads meet at 38.71554, -111.10325. Continue the remaining distance to the West Rim TH at 38.71571, -111.08412, which is perched above Muddy Creek with an excellent view. It will be difficult to pound tent stakes into the ground.
To drive to the approach TH reverse the drive back to the triangle junction and continue east. Turn south at 38.78456, -111.07617 at what looks like a seldom used track.
Challenge #1: a tight right hand corner may be more challenging for vehicles with longer wheelbases or lower clearance.
Turn right/south at a junction 38.77336, -111.06662 and right/south again at the next junction 38.74515, -111.04108.
Challenge #2: some rock building might be required at the bottom of a steep hill to navigate over the wash. Scrape the trailer hitch and continue.
Arrive at the Stock Pond TH 38.73910, -111.05065. To drive a bit closer, follow an ATV track southeast, which ends at nice parking location at 38.73123, -111.04197.
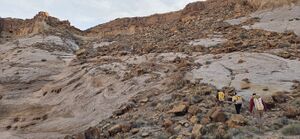
Hike east up and over the top of some of the washes following the ATV trail and wild horse trails when possible. Aim for the first downclimb in a short drainage at 38.72450, -111.01246 to access the bench below.
DC: 25'
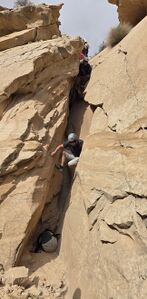
DC: 50' DCL down a sandstone slope. Or potential rappel.
Continue hiking southwest maintaining elevation to Two Buttes at 38.71793, -111.02587. Hike up and over a final saddle into the Middle Fork drainage. Hike south to a tributary drainage and the first entrance rappel.
Summitpost Beta
Finding the head of the canyon is an adventure in route finding. It is highly recommended that you scout out the route from the Stock Pond Trailhead to the head of the canyon the day before the hike, as the trip is a very long day hike, and you don't want to spend too much time route finding around trying to find the canyon on the day of descent. Make sure to follow your maps carefully to make sure you head down the correct drainage. You must be proficient in route finding; there is no marked route, and the many drainages can make navigation very confusing.
Stock Pond Trailhead Approach
Beginning at the Stock Pond Trailhead you will navigate using reference points on a USGS Topo. The USGS maps for the area contain numbered [prospect] points next to a small "X". When approaching the Middle Fork of Gem Canyon you will be aiming for point 6675.
- Starting at the Stock Pond Trailhead (which is just south of point 6150) navigate eastward towards point 6350.
- Next, head southeast towards point 6505 (which is south of the word "DIKE" on the map).
Middle Fork Approach
- From point 6505 continue southeast aiming for point 6675 as you cross the drainage for the West Fork.
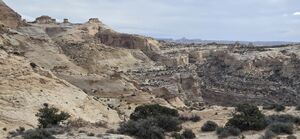
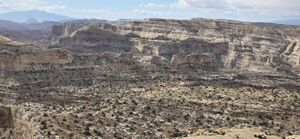
- Point 6675 is on the cliff edge and offers one heck of a viewpoint. There are countless towers, cliffs, and canyons visible. Poor Canyon is 1400 feet down below.
- Once at point 6675, take notice of the small drainage just to the northeast. This will provide access to the bench below and is your route.
- As you head down the drainage but shortly you will reach a bench and will need to contour south around the cliffs until you can follow the bench towards the southwest.
- Follow the bench for about a mile until you reach two little buttes (at N38*43’7.005” W111*1’30.130”) which form a saddle on the top of a ridge.
- Pass the buttes just to the north of the first one and continue over the saddle and down the other side towards the southwest untill you find a precarious drainage route that you can descend to the canyon bottom.
Descent
Apr 2026 update
R1: 145' two stage rappel in the entrance tributary from a boulder pinch (38.71793, -111.02685)
A few short DCs kick off the hike down the main drainage
First Narrows contains several DCs including,
DC/R: 30' old webbing on chockstone
DC/R: 20' old webbing on chockstone
Narrows end with a geology layer change and open up. Hike a ways in the wash to the next narrows and Bighorn Falls
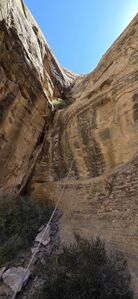
R2: 195' Bighorn Falls, anchoring from a small arch in the drainage. The first tier ends about 165' down. Fiddling this drop presented no issue in retrieval.
Several short DCs follow before another long wash section. Halfway to the final rappel, the West Fork of Gem enters DCR.
R3: 50' from a boulder on the higher ledge DCL. This apparently has also been called out as a 15' overhung drop anchoring near the pour spout.
Summitpost Beta
Middle Fork Descent
Once at the precarious drainage you will likely have to rappel like the the first descent party did. They found a place to access with only a 30 ft rappel but the presence of bighorn sheep tracks indicated to them that there may be a low 5th class or 4th class alternative route to the canyon bottom.
- Slot Section:
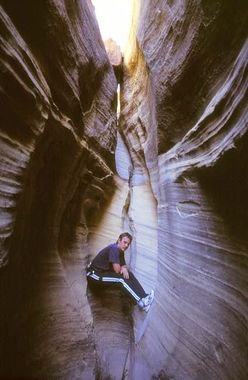
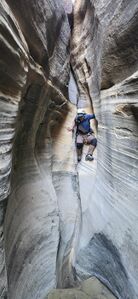
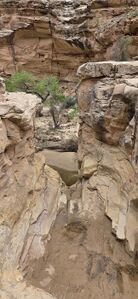
Continuing down canyon you will find a deep slot that, in one section, is striped and similar to the Zebra Slot in Escalante Utah. There are more varieties and different colored layers of the Navajo sandstone than seen in other areas as the Navajo is not a uniform formation in color or texture here. The Navajo Sandstone is also over 1000 feet thick in this complex. The slot has several 5th class drops, but the first descent party managed to down-climb all but the final drop. There is at least one pool in the slot which ends with a cool log jam overhead. The canyon is now wider, but still scenic.
- Slot Drop: 30 ft - Anchored from a chockstone.
At the end of the slot section is a 30 foot overhanging drop anchored of a chockstone. This spot can also pose an awkward overhanging start.
- Bighorn Falls: 195 ft
After a fairly easy and pleasant hike-a-canyon section, you will find yourself at Bighorn Falls--the big drop of the canyon. The first descent party named this Bighorn Falls because they observed may bighorn tracks at the bottom of the falls.
This rappel is a two-stage drop, but since there are no anchors between the two drops, you must do this as one continuous rappel from the top anchor. The first descent party went off the north side of the drop and off a chockstone. A 60m rope will would just reach the bottom of both drops, but that can make the rope difficult to pull from below to retrieve the ropes. Pulling the ropes from below can be difficult in its own right, so make sure you set the rap anchor so as the ropes will pull from below.
- The distance to the first drop is 165 ft (50 m) and mostly overhanging.
- The second state is 30 ft (9 m) and is also an overhanging drop.
Note, at the top of Bighorn Falls there is a shallow pothole-laced slot.
- Additional Short Drops:
After bighorn Falls are a few short drops that can be bypassed, and then hiking the canyon is fairly easy until the confluence with the West Fork.
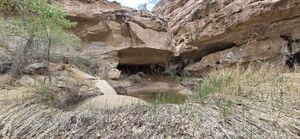
The next section of the canyon is also spectacular and contains a nice surprise. There are several huge Ponderosa pines lined up against the huge north facing cliff face in this section of the canyon. This is a really rare site in this hot desert area.
Gem Canyon Descent
- Final Rappel: 15 ft
This final rappel comes after the junction with the Middle Fork of Gem Canyon so it is called " The final obstacle is a 15 foot rappel over a flowing waterfall (which may dry up at times). This is the shortest rappel, but also the trickiest because it is over an awkward overhang. You will likely show your klutziness on this one.
Exit
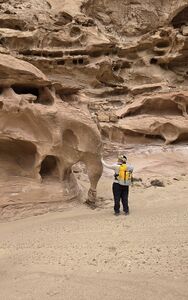
For the rest of Gem Canyon there are no more technical obstacles, but the scenery is still great. Follow Gem Canyon down to the confluence with Muddy Creek. There are fantastic erosional features on the way. Keep a keen eye out for Elephant Rock (see photo in Summit Post).
Tomsich Butte Exit (65-Mile car shuttle)
This exit options is physically the easiest but requires a 65-mile car shuttle to setup. Previous to descending the canyon, place an exit vehicle at Tomsich Butte (https://maps.app.goo.gl/gZxhQvsGSTS2XfTw9 | 38°41'12.5"N 110°59'26.6"W) You can easily Google for directions here so the route description will not be given here--but it is described in the Summit Post write ups.
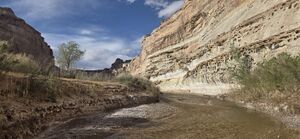
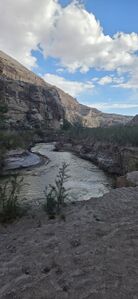
Upon reaching the Muddy Creek, head down stream. It is then a pretty easy walk down along Muddy Creek down to Tomsich Butte. Muddy Creek is usually ankle deep, but in a very wet year it may be deeper in April and May. The scenery along Muddy Creek is great. You will pass Poor Canyon coming in from the left and then the Merry Go Round rincon (former bend in the stream) before reaching the trailhead. Hopefully you recognize where you left your vehicle.
West Rim Exit (16-mile car shuttle)
Stats on this page used this exit to the West Rim at (38.71571, -111.0841) The West Rim option is the middle ground: a little longer hiking than Tomisch Butte, but a lot shorter for the shuttle. All of the elevation arrives at the end, but the trail out of Muddy Creek is easy and starts with a tall monolithic cairn. The hike west/northwest following horse trails along Muddy Creek is rather spectacular and one of those moments that inspires the thought that canyons take you to amazing places.
Muddy Creek / Ramp Exit
When you reach Muddy Creek head upstream. This is a pretty easy, but long walk, up Muddy Creek to Poncho Wash and the exit ramp. The Muddy is usually ankle deep, but in a very wet year it may be deeper in April and May. After several miles you will encounter Enigma canyon joining the Muddy. This is a sign that you are close to Poncho Wash. At this point continue hiking upstream a short way keeping a look out for a narrow side canyon on the East (up canyon right) with a wash emanating from it. This is the bottom of Poncho Wash and the start of the Ramp Exit.
Hike up Poncho Wash for only 0.3 miles while keeping a close eye out to the right. In Poncho Wash you will notice a ramp on both the right and left sides of the canyon. This is caused by a fault line. The left (north) ramp dead ends on a high cliff above Muddy Creek. The right (south) ramp is the one you want. These ramps are just before a big bend in Poncho Wash (while heading up canyon).
Carefully make your way up the ramp. Loose rocks are a hazard throughout the ramp, so use caution. Only one place is exposed and it can be covered with slippery mud at times.
After climbing the ramp, veer right and scramble up to the top of the rim. There is a nice break in the cliffs making the rest of the route fairly easy. From here you need a map, compass, GPS will be best but in general you want to head northeast keeping between the Poncho Wash drainage on the north and rim walking the Enigma Canyon drainage on the south until it subsides into a draw. Once it does head due north back to the Stock Pond trailhead.
Red tape
Beta sites
 Super Amazing Map : Gem Canyon (Middle Fork)
 SummitPost.org : Little Gem Canyon-Middle Fork
Trip reports and media
 Scott Patterson on Canyon Tales : Middle Fork of Gem Canyon, March 2003
