Grotto Canyon (South Fork, Death Valley)
| Rating: | |||||||||||||||||||||||||||||||
|---|---|---|---|---|---|---|---|---|---|---|---|---|---|---|---|---|---|---|---|---|---|---|---|---|---|---|---|---|---|---|---|
| | Difficulty:3A IV (v3a1 IV) Raps:9-17, max ↨120ft
Red Tape:No permit required Shuttle:None Vehicle:Passenger Rock type:Limestone | ||||||||||||||||||||||||||||||
| Start: | |||||||||||||||||||||||||||||||
| Parking: | |||||||||||||||||||||||||||||||
| Condition Reports: | 25 Jan 2026
"So pretty! Due to road closures we had to alter originally planned canyons (Note to self: check road closures) and ended up here at the recommendation |
||||||||||||||||||||||||||||||
| Best season: | Oct-Mar
|
||||||||||||||||||||||||||||||
| Regions: | |||||||||||||||||||||||||||||||
Introduction
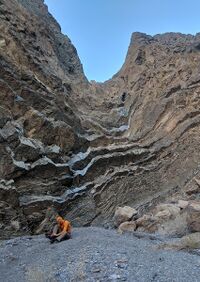
 This route includes rappels down polished limestone chutes, fun downclimbs, intriguing straight corridors between tilted bedrock layers, and curvy narrows.
You do have to pay for it with 3,200' feet of elevation gain in 3.5 miles.
Approach
From CA-190, turn south onto Grotto Canyon Road. A sedan driven with care can make it if the road has been graded recently. Drive about one mile to the parking lot (430' elevation). (The road no longer continues past this point into the wash.)
Walk up a gentle slope until it reaches the ridge. The route gets loose and steep. At 2,050' you will reach Point Hideous, which has a wonderful view of the early morning light on Mesquite Flat Sand Dunes.
Gentle, slightly downhill walk along the ridge to cross a wash at 1,980' elevation.
Scramble up a steep limestone ridge, stopping occasionally to enjoy the snail fossils. The drainage to your left is the East, or Not-So-Much, Fork. Your destination is on the other side of the saddle at the top of the East Fork. Unfortunately, you need to go slightly higher than the saddle to get past some cliff bands.
At about 3,350' you should see an each route down into a broad basin that leads to a narrow canyon. This is what RopeWiki previously called the sneak route, and it is the only route described here, since the "full route" involves a longer hike and no additional technical section.
Descent
The first downclimb begins with an exposed pour-over to warm you up.
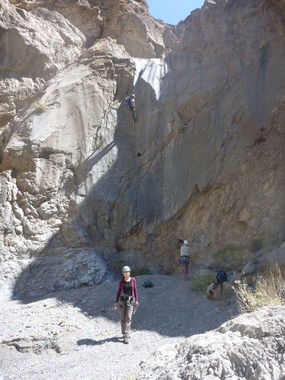
R1 (20') is anchored from a rock chock high on the left wall.
Optional R2 (15') is anchored from a pinch point. This can be downclimbed on the left side.
Junction with larger drainage (what was previously referred to as the full route).
R3 (50' or about 100') anchored from pinch about six feet up on left wall. The first stage is about 50' past upturned rock layers. The second stage is a fun downclimb.
R4 (120') two-stage rappel, anchored either from a cairn on the right, or from a crack high on a ledge on the left.
Rabbit-hole downclimb through boulders on the right leads immediately to R5.
R5 (20') is anchored from a pinch point in boulders 20 feet back from the edge. Just after R5 is the next obstacle:
Optional R5A (20') can be downclimbed on left or can be anchored from a medium-sized rock.
R6 (20') anchored from nut or knot chock on right wall, descends polished chute
Scenic narrows.
Optional R7 (15') anchored from left, or climb over on left side and down a ridge.
Optional R8 (multi-stage) "The Escalator" is a unique downclimb where the narrow canyon open up into a large open space. Some may want to be meat anchored down the watercourse, but the climb is iconic:
- Downclimb the first 8-foot drop, then scramble up onto the low ridge on your right. On the far side of that ridge will be a inward-sloping ramp that descends to the next level. Descend to the gravel floor, then over the next ridge to find another escalator to your left or an easy walk-off to the right.
R9 (80') anchored from pinch point in rocks on the right.
Optional R10 (40') - leave main watercourse, go up on right bank to find a cairn and a low-angle chute that leads to a 8' drop. It is an easy climb until the end, when most will want a partner assist.
R11 (90) from near-pinch (really more of a knot chock if you truly inspect it) on the left. Beautiful rappel. Immediately followed by next rappel.
R12 (70') from cairn, then turn corner to find next rappel
R13 (20'), anchored from a pinch point on right about 25' back from the edge
R14 (30') from either two pitons on right, or a horn on right. Can be downclimbed.
Walk about 1/4 mile to junction with main canyon.
Downclimb through rabbit-hole behind boulder on the right.
Walk about 1/4 mile.
R15 (50') from rock chock high on right wall. Or there is a 1/4-mile-long bypass using a trail on the right. But this rappel is down a nice, polished cute and drops you into "The Grotto", which is very scenic.
Walk about 1/3 mile.
R16 (12') probably won't have an anchor. You can rig this as a retrievable anchor over the giant boulder (counter-weight rappel). Very good climbers can down-climb. One more downclimb.
Canyon opens up into a wash.
Exit
Continue down wash to parking.
Red tape
National Park Service information about canyoneering in Death Valley National Park
Camping (even sleeping in your car) is not allowed at this trailhead. Stovepipe Wells Campground is nearby.
Beta sites
 Super Amazing Map : Grotto - S Fork
 BluuGnome.com : Grotto Canyon - Layer Fork
Trip reports and media
FIRST DESCENT TRIP on 3-27-11
Background
Originally explored by Scott Swaney and Rick Kent, & team, on 3-27-11. See trip report above more details and teammates.
