High Falls
| Rating: | |||||||||||||||||||||||||||||||
|---|---|---|---|---|---|---|---|---|---|---|---|---|---|---|---|---|---|---|---|---|---|---|---|---|---|---|---|---|---|---|---|
| | Raps:19 - 22, max ↨164ft
Red Tape:No permit required Shuttle:Required 25 min Vehicle:4WD - High Clearance | ||||||||||||||||||||||||||||||
| Start: | |||||||||||||||||||||||||||||||
| Parking: | |||||||||||||||||||||||||||||||
| Shuttle: | |||||||||||||||||||||||||||||||
| Condition Reports: | 12 Sep 2025
"A second visit this season, and another glorious trip through High Falls. Took the opportunity to double-up 11 of the single bolt anchors, and added a |
||||||||||||||||||||||||||||||
| Best season: | aug-sep
|
||||||||||||||||||||||||||||||
| Regions: | |||||||||||||||||||||||||||||||
Introduction
High Falls is an excellent challenging canyon 30 min outside of Squamish. The full canyon is a long day out with 450 meters of vertical descent. High Falls Creek is noticeably split by the large 110m three-tiered waterfall in the middle of the canyon, with two massive hanging pools. Above the falls, the canyon is tight and narrow with sculpted passages and demanding water features. After the falls, the canyon has towering walls (100m+) with consistent drops until the end.
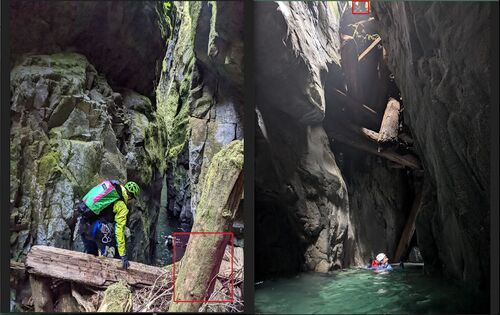
High Falls Creek is not to be underestimated. Much of the year the flow could be A5 or greater. The canyon is EXTREMELY slippery, so caution must be taken when approaching edges. There are many false floors created by log jams and a massive fragile logjam in the upper section that demand climbing gingerly. Staying on top of the large pieces of wood is generally best practice and avoid pulling sideways. This canyon displays a high flow even in the midst of summer.
The Power of Water
As of 2024 some log jams have cleared in the Upper Section. It wasn't apparent until now exactly how enormous they were and how much the blockage had raised the level of the river bed.
Flow Checking
The High Falls Creek Trail has viewpoints which provide excellent flow-check locations.
Approach
Drive one vehicle up the forest service road to the top of the High Falls Creek trail, there is parking for 2-3 cars.
From the road bushwhack 15m down to the obvious trail just inside the treeline.
Go right on the trail and hike about 100m. At a junction the trail makes a 90 degree right turn. There is a knoll and clearing straight ahead and a clearing to the left. Leave the trail, heading straight over the knoll and down where the forest is clear
After descending 30m you will see a cliff band on your right and a very steep drop off ahead. Go right following the bottom of the cliff band for 30m or so, then turn left and downwards and scramble down an unlikely way directly down into the creek. You are aiming for 49.9462, -123.2917. Left or right of this point on either side will require rappelling.
Descent
| No. | Type | Location | Length | Notes |
|---|---|---|---|---|
| Upper Canyon | ||||
| 1 | unlinked bolts | CR | 26ft / 8m | |
| 2 | unlinked bolts | CL | 92ft / 28m | It is advisable to set a handline off logs approximately 7m away to traverse over a false floor to reach these exposed bolts. This waterfall drops into a beautiful cavern like section. Note: This is usually the most pummeling rappel of the whole route. You can expect rappels after this to be easier. |
| 3 | log jam | — | 7ft / 2m | Rappel from overhead log jam, or 2m technical jump into a shallow pool. |
| 4a | unlinked bolts | CR | 20ft / 6m | Two stages. Note in previous years the huge log at your feet, which hasn't moved, was actually overhead. The floor of the pool has risen 6ft due to debris being caught and gravel filling-in. |
| 4b | rappel/jump | CR | — | Either stay on rappel or jump the second stage (deeper CR). |
| 5 | unlinked bolts / jump | CL | 23ft / 7m | After a small downclimb/slide around a corner, swim across the pool and climb out to unlinked bolts on CL. This climb out will be challenging in higher flows because the majority of the pool exits here. Steel wool is recommended for cleaning the slippery rock face before jumping. |
| Slide | — | CL | 20ft / 6m | Sit on CL and slide the low angle but powerful 6m slide. The slide flushes you to the opposite wall, but exiting the pool requires climbing out in potentially strong concentrated current. In high flows, this could be extremely challenging. The pool below is a strong eddy, and it will trap bags in lower flows (and people in higher flows). A 8mm Petzl Pulse hole is located on the CR wall at the top of the slide to facilitate zipping-packs to a team member across the pool. |
| 6 | unlinked bolts | CR | 36ft / 11m | Slippery climb out of the pool to reach it. This waterfall is visible from the High Falls lookout, and is a great flow reference. |
| 7 | unlinked bolts | CL | 26ft / 8m | Hanging rappel out of the flow. |
| Slide | — | — | 20ft / 6m | Can be depth checked using large tree root on CR. |
| 8 | single bolt | CL or CR | 20ft / 6m | Wet line: single bolt CL at edge of pool, hard to stage people & packs. Dry line: single bolt CR much easier to stage packs. |
| Directly after R8 is a useful spot to eat & plan for the main falls. At this point you're directly below the upper High Falls lookout. A scouting team rigged bolts at this lookout, making it possible to rappel down into the canyon from there. This makes it a useful evacuation point (requiring either pre-planning to drop a rope here as you shuttle up, or with the assistance of others from above). | ||||
| High Falls R9 through R12 should be linked to each other in a series of rebelays. Essentially this section is done as four consecutive pitches. | ||||
| Traverse to R9 | single bolt | CL | 26ft / 8m (?) | Traverse line to R9. This will protect your team from the huge false floor as they approach the R9 anchor. |
| 9 (Pitch 1/4) | unlinked bolts | CL | 115ft / 35m | Rappel 25m down and around the corner out of sight to a small but obvious ledge. Stay on the rope, and traverse the ledge under the roof for another 10m until reaching the bolts for R10. The total length of rope needed from anchor to anchor is 35m. Do not rappel into the pool - exiting it is very hard! |
| 10 (Pitch 2/4) | unlinked bolts | CL | 39ft / 12m | From unlinked bolts on CL down the first sloping section of High Falls to reach the R11 anchor right at the brink of the main drop. |
| 11 (Pitch 3/4) | unlinked bolts | CL | 180ft / 55m | From unlinked bolts on CL at an exposed and airy ledge. Rappel straight down, over the sloping edge, and out of sight of the anchor. You'll soon reach a large crack (1.5 to 2m wide) that trends CL and downwards. Follow this crack down until you see a 1m wide ledge just to the CR of the crack (large enough for 3 people). On this ledge you'll find the bolts for R12. |
| 12 (Pitch 4/4) | unlinked bolts | — | 148ft / 45m | Time to enjoy the spray! The bolts were placed in a mossy face, so don't be surprised if the moss grows over the bolts after a long period of disuse. This rebelay location is spectacular but potentially unpleasant to hang out for long periods of time. The spray from the waterfall above is strong enough that you cannot look above you with goggles. Consider bump-and-go anchor managing if needed. |
| Lower Canyon | ||||
| 13 | unlinked bolts | CR | 49ft / 15m | After swimming across the pool at the base of High Falls, climb up CR to unlinked bolt. Rappel 15m along the ledge to the next bolts. This is a hybrid rappel/traverse line. |
| 14 | unlinked bolts | CR | 46ft / 14m | |
| Jump | — | CL | 7ft / 2m | |
| 15 | unlinked bolts | CR | 66ft / 20m | Traverse a narrow ledge for ~10m to reach the anchor. The traverse can be somewhat protected/belayed from a single bolt placed on the outside of the large boulder in the log pool. Set the rope length to reach to the pool right/downstream of the boulder down below. Awkward undercut beneath boulder. |
| Jump | — | center | 10ft / 3m | From the center of falls into a pool. |
| 16 | unlinked bolts | CL | 33ft / 10m | |
| 17 | single bolt | CL | 26ft / 8m | |
| 18 | single bolt / slide | CL (HIGH) | 30ft / 9m | Single bolt approximately 2.5m above the canyon floor. This has also been slid near the CL side of the drop. |
| 19 | single bolt / jump | CL | 33ft / 10m | Single bolt on top of large boulder CL. This is also a jump, into the center of the pool CR below. Either from the top, or rope-assisted slightly lower down. |
| 20 | unlinked bolts | CL | 30ft / 9m | |
| Walk 200m or so to exit on CR. | ||||
Exit
Walk down the creek until the wall on CR ends. Find a natural staircase up and a short social trail through clear forest that leads back to the main trail. Walk the main trail 100m to the carpark.
Red tape
Beta sites
 CanyoneeringNorthwest.com (archive.org) : High Falls Creek Prospect
Trip reports and media
Background
High Falls was initially scouted by Chris Hood in 2003. The first full descent was made on September 4th, 2019 by Kevin Steffa, Ben Thomas, Andrew Humphreys, Michael Henson, and Brent Roth.


