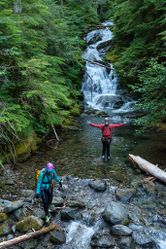
Olallie Creek
| Rating: | |||||||||||||||||||||||||||||||
|---|---|---|---|---|---|---|---|---|---|---|---|---|---|---|---|---|---|---|---|---|---|---|---|---|---|---|---|---|---|---|---|
| | Raps:10-17, max ↨200ft
Red Tape:Permit required Shuttle:Optional 1 min Vehicle:Passenger | ||||||||||||||||||||||||||||||
| Start: | |||||||||||||||||||||||||||||||
| Parking: | |||||||||||||||||||||||||||||||
| Shuttle: | |||||||||||||||||||||||||||||||
| Condition Reports: | 9 Aug 2024
"Great to return to Olallie after a couple of years. Some improved anchors that let you run the flow now. Still would be worth following up with the pa |
||||||||||||||||||||||||||||||
| Best season: | July-Sept
|
||||||||||||||||||||||||||||||
| Regions: | |||||||||||||||||||||||||||||||
Introduction[edit]
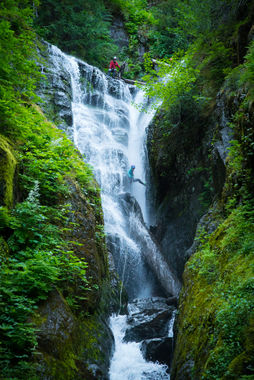
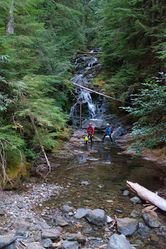
In the span of one mile, Olallie presents obstacles galore; there are at least sixteen drops with two major rappel sequences and countless downclimbs. The canyon starts off with crystal clear pools and rock beds that change colors from rusty red, white, pitch black, to speckles of red and turquoise. There's an inviting crooked corridor, walls that grow over 100ft, ferns that drape from the sides, and trees growing on top of large chockstones. There is a four foot crack where all the flow drains into a roaring chute of water, whiteout, and a siphon in higher flow.
The best location for a reference photo is from the bridge on the Eastside Trail at the canyon's exit.
- Olallie is in a Wilderness area. Bolts are prohibited without a permit. All anchors are natural features.
- Your group should come prepared with sufficient natural anchor-building experience and materials, especially if you're first through in a given season. Be aware: some rappels have limited anchor options.
- Olallie is a pristine canyon; please help us keep it that way. Ensure your gear is clean and dry before entering. If you introduce invasive species, they can destroy the canyon ecosystem
- Please see "Red Tape" below for special information on accessing the canyon.
Approach[edit]
Drive into Mt Rainier National Park proper via the Stevens Canyon entrance. A National Park Pass or entrance fee is required for each vehicle. There is additional parking alongside the road just outside the park entrance for those without park passes. Park at the Grove of the Patriarchs parking lot, where there are restrooms. This lot fills up quickly in the summer so it's a good idea to get there early.
The hike from Grove of the Patriarchs is well worth it as you can take a 2 minute side trip to a viewpoint for Silver Falls of the Ohanapecosh River. From the Grove of the Patriarchs parking lot, take the Eastside Trail, which starts across the street from the restrooms, 0.5 mi. to a trail intersection. At the intersection go right up Cowlitz Divide Trail 0.2 mi., cross the road, then continue 1.5 mi. to an elevation of 3300 feet. As the trail curves left (46.7723, -121.5693) continue straight through mostly open forest and down, dropping 200 feet in elevation.
If doing the Upper Section, continue up the trail to 3700 feet, then bushwack right a short distance.
- Before dropping into the canyon, please brush off your gear to ensure you aren’t transporting seeds from areas near the parking lot. Please be vigilant about not transporting invasives. Thank you!
Descent[edit]
Upper Section[edit]
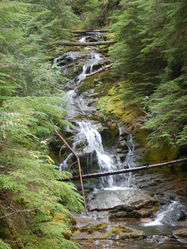
The upper sections will add 0.6mi of creek walking, ~6 rappels, downclimbs in flow, crystal clear pools, and beautiful rock beds that are speckled with red, white, and turquoise colors. There are at least 6-10 downclimbs that can be done as rappels based on flow and comfort level that are not documented in the beta.
R1: 30' DCL - tree
R2: 30' DCR - boulder
R3: 90' Center - log spanning the creek
R4: 20' DCR - tree
R5: 20' Center - log spanning the creek
R6: 30' DCL - tree. In higher flow, the water forms a curtain that you can swim behind.
The Main Event[edit]
Beta has been updated to reflect conditions as of July 2024.
R1: 155’ - tree DCL Anchor is about 20' back from the lip. Rappel or controlled slide into a deep pool. This drop can also be jumped from the lip right 30' or by downclimbing past a tree against the right wall right to a small ledge 15'. In high flow, check for hydraulics. Continue on rope across the pool, climb out near the pour over, continue down through a small bowl into the next pool, which is partially filled in with large rocks.
R2: 65’ - rock pile DCL Rebuild, solidify the anchor as needed. Meat backup is recommended.
R3: 55' - log DCR (Moderate or low flow). Note that the creek bends abruptly left past the boulder, so beware of rope pinching which could interfere with retrieval from below. (High Flow) Scramble up a path DCL and dry rappel from a tree in the center of the canyon. Careful of the roots, limbs, and branches as you rappel.
At the base of this rappel, there is a grotto you can climb into. Look back upstream and look for flow stone and some small stalagmites on your right. Enjoy the last bit of sun before you enter the corridor and the narrows.
R4: 15' - boulder DCL Rappel is into a narrows. Walk through a gorgeous corridor with slightly slanted walls for about 50 yards. Don't forget to look back.
R5: 100' - tree DCL
R6: 85' - log DCL (Apparition Falls) This is the most technical part of the canyon, and in high flow can be very dangerous. The water here funnels into a narrow chute about 3 feet wide. There are many large logs, rocks, and pinch points that can easily trap ropes when pulled, particularly a pile of wood debris 20 feet up from the bottom. It is recommended for the first rappeller to deploy rope from a bag as they go to avoid dropping a rope into the strainer. For the last rappeller it is recommended to go in two pitches by getting on top of a massive vertical log's root ball about 60 feet down, pulling the rope from there, and then rappelling from webbing the final 25 feet. This move requires some acrobatic skill and is not recommended for the entire group.
At high flows, the concentrated water in the chute is very powerful and can be enough to knock you off your feet. Spray coming in from the sides of the chute result in very poor visibility. Stemming above the chute is ideal, but potentially difficult. Removing your pack and sending it down later on a zipline could be helpful. At low flow, the chute is not pushy. At moderate flow it is a bit pushy but not dangerous, and manageable for most canyoneers.
R7: 60' - center log Rap down a couple of small drops then through a small chute or stem above the water. For the rope pull, downclimb DCL 10 feet and anchor from webbing around a log for a clean pull. The chute can be jumped by executing a technical jump into the narrow channel with ledges protruding underwater on both sides.
R8: 50' - root ball DCR
R9: 30' - center log (aka The Mouth Washer). In high water, the stream flows directly over a large log and unavoidably douses rappellers in the face.
R10: 25' - log DCL The pool below is very deep and can be jumped. Be sure to send a person down to check depth before any jumps. There is also a cool cave to check out behind the waterfall.
R11: 20' - tree DCL Enjoy the last rappel.
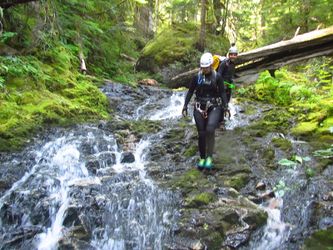
Creek walk 15-20 minutes down a beautiful, wide, grippy creekbed to a footbridge and exit DCL. There are some downclimbs and nice bedrock to walk on along the way. This is a high-quality creek walk.
Exit[edit]
Follow the flat East Side Trail south for ~1.5mi back to your car. Near the end you will reach a junction. Go left and over a footbridge to tour the Grove of the Patriarchs. It's an impressive stand of old growth trees. Cross the suspension bridge and follow the 0.3mi loop. Continue straight to return to the Grove of the Patriarchs parking area.
Red tape[edit]
Entrance Fee[edit]
Mt. Rainier has an entrance fee. [1]
Timed Entry System[edit]
Mount Rainier will be instituting a "pilot" timed entry system from Memorial Day-Labor Day, 2024. Some key points:
- No reservation is needed if you arrive before 7am.
- There is no limit on how long you stay.
- Each vehicle must have a unique timed entry ticket, and must enter during that 2 hour window.
- Reservations for entry are through recreation.gov, and timelines for when they open are on the website.
Any canyons along the Paradise/Stevens Canyon corridor need to be planned in advance. July trips need to be planned by April 1. August trips by May 1. Either plan on one vehicle only, or have at least two members of your team identified (and plan to be in separate vehicles). Alternatively, arrive early and enter the park before 7am.
Beta sites[edit]
https://www.canyoningthe406.com/olalliecreekcanyon
Trip reports and media[edit]
- https://www.facebook.com/jeffbartlett/posts/10212871179792746 Olallie in low water, Sep 2017
- https://www.facebook.com/jeffbartlett/posts/10212306184988229 Olallie Creek first documented descent, Jul 2017
- https://www.youtube.com/watch?v=17Qtumybaq0
Background[edit]
A documentation trip was done on July 15, 2017 by Barry Specht, Dan Yeisley, Jake Huddleston, Jeff Bartlett, and Tiffanie Lin. Webbing was found on two of the rappels. Thanks to Luca Chiarabini and Tabby Cavendish for the additional background and support.
