Scatters
| Rating: | |||||||||||||||||||||||||||||||
|---|---|---|---|---|---|---|---|---|---|---|---|---|---|---|---|---|---|---|---|---|---|---|---|---|---|---|---|---|---|---|---|
| | Difficulty:2B III (v1a2 III) Raps:O
Red Tape: Shuttle: | ||||||||||||||||||||||||||||||
| Location: | |||||||||||||||||||||||||||||||
| Condition Reports: | |||||||||||||||||||||||||||||||
| Best season: | Oct-Apr (avg for this region)
|
||||||||||||||||||||||||||||||
| Regions: | |||||||||||||||||||||||||||||||
Introduction
This is an average quality canyon, much better to do after rain, rather than bone dry. For sure worth doing once!
This canyon is described in limited detail in Canyons Near Sydney by Rick Jamieson. Help the Australian canyoning community by contributing track notes to ropewiki.com
Approach
Park at the usual Waratah Ridge carpark and walk in on the Hole In The Wall canyon access track for 2.5kms to an old carpark. Turn off to the right and through some light scrub til it opens up for some very easy walking down an open ridge line.
After a bit, veer right down into the feeder creek and the easy canyon sections in that creek started almost straight away. It really is an easy entry. There is NO track to this one, but really you don't need it.
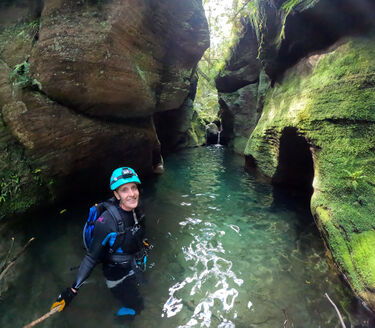
Follow the feeder creek, passing through some pretty, but short canyon sections, til you pass through a nice tunnel and out the otherside. From here down to the main creek is boulders and downed trees. Eventually you will come to a small waterfall, cross over the top of it to the true left bank for an easy way back into the creek, another crawl under boulders brings you out onto a ledge above a crystal clear pool. Obviously, this may not always be a pool. Slide or jump into the pool, with a depth of 5-6 feet deep. Just down from here is the confluence with the main creek.
Descent
Follow the creek down in and out of various canyon sections and features, there may be a couple of tunnel swims and a couple of down-climbs or very short and easy abseils. There is a beautiful long pool that is quite deep, it can be jumped if it is checked first, or, slide down a bit then jump in to reduce the height of the jump. It is not far past this you reach the confluence with the South branch of the Bungleboori.
Exit
2 possible options, go right, upstream to the "traditional" exit back up onto a ridge and back to the HITW carpark.
Other option is to go left and downstream to the Hailstorm Retreat canyon exit.
Red tape
Beta sites
Trip reports and media
 Tony Maurer & Joe Bugden on Canyon Tales : Tiger snakebite & helicopter rescue
 Rachel Grindlay : Scatters & Luna Park
 YouTube.com : Richard Pattison, Scatters Canyon movie
