San Diego River Gorge
| Rating: | |||||||||||||||||||||||||||||||
|---|---|---|---|---|---|---|---|---|---|---|---|---|---|---|---|---|---|---|---|---|---|---|---|---|---|---|---|---|---|---|---|
| | Difficulty:3A II (v3a1 II) Raps:4, max ↨100ft
Red Tape: Shuttle: Vehicle:Passenger | ||||||||||||||||||||||||||||||
| Location: | |||||||||||||||||||||||||||||||
| Condition Reports: | 20 Dec 2014
"Canyon is dry with a some shallow pools of water below the waterfalls. The canyon is only worth doing if there is significantly more water. From a can |
||||||||||||||||||||||||||||||
| Best season: | Feb-Apr
|
||||||||||||||||||||||||||||||
| Regions: | |||||||||||||||||||||||||||||||
Introduction[edit]
This trip can be done as a short technical 5mi dayhike with 2-3 rappels or as a much longer semi-technical 10mi backpacking trip. The gorge is full of poison oak, so make sure to wear long sleeves and long pants and if backpacking bring some soap or alcohol impregnated wipes to clean yourself up at night (soap will wash away poison oak oil while alcohol neutralizes it). Beware of ticks, especially as the days get warmer.
If backpacking, you may opt to not bring any vertical gear at all and just plan to bypass all waterfalls, but that is not recommended. Lighten the load instead, just bring a 100' rope, 100' pullcord, a light descender and 50' of webbing to make anchors AND to make a Webbing harness.
To make this trip worthwhile it is critical to catch the San Diego River in good flow, which usually happens early in the season and only on good snow years. A good checkpoint is the first waterfall you find in the descent, if the flow there is not good you should do the canyon as a day trip and postpone any backpacking plans to a better time.
Approach[edit]
The approach starts at the Inaja Memorial parking lot, in the vicinity of Julian. From the parking lot find the picnic table closest to the highway (extreme left heading down). Find the path that descends to the river. You are now at the junction of the San Diego river and Coleman creek. Head down canyon on the right bank. You will have to fight some overgrown brush and ascend for awhile before coming back down, but shortly you will find the vegetation opens up. Continue a short while until you reach the first waterfall. The backpack trip requires to leave a vehicle at the exit of the Cedar Creek Falls trailhead and have someone drop you off at the Inaja Memorial parking lot, since it's not allowed to park there overnight.
Descent[edit]
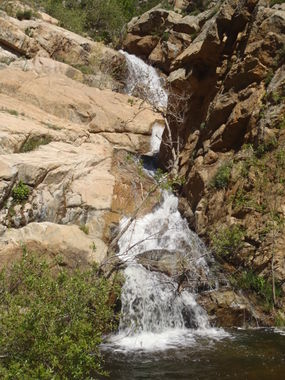
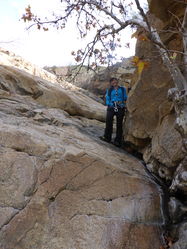
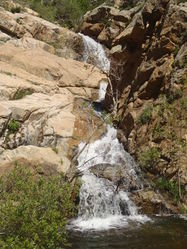
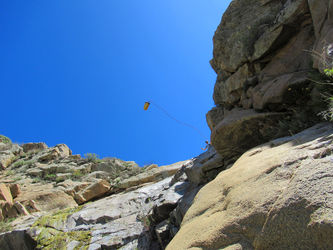
There are 3 waterfalls in quick succession a short distance down from the Inaja Memorial. Hikers bypass these falls by going around the side of the cliffs, but it's much more fun to rappel them. R1: 100'+ from tree just back from the top R2: 20ft bypassable DCL or jump when flowing strong R3: 75ft from chock knot in a crack DCL We did not find a way to downclimb the last rappel. Be ready to ascend it, unless you want a tiring, uphill hike out. That requires some nav and crossing private property. When we did it, the owner was very friendly and gave us the history of his family who have owned both sides of the highway at Santa Ysabel since the early 1900s.
If you are backpacking (or if you have time for it), continue hiking down the river 2 miles to one big 100ft waterfall, the biggest fall you will find in the gorge. This will require intense bushwhacking greatly simplified by following an old dirt road first and then Cow's trails along the edges of the river, switching from left to right when appropriate.
Right before reaching the big waterfall is a nice camping spot with a couple fire rings, possible overnight option if you are backpacking. If you are day hiking turn around at the waterfall and head back up to take the exit trail back to the car, which should take you about 2.5h.
The backpack trip continues down the river all the way to the Cedar Creek falls exit trail. Less bushwacking effort is required the further downstream you go, or so I was told.
Exit[edit]
After the first technical section you have the option to use a possible bushwack exit or continue downstream to the official exit trail. We did not use the bushwack exit shown on the map, but did use a short cut to reach the main exit dirt road.
The backpacking trip exits up the Cedar Creek Falls trail.
==Red tape==Private property on the exit route. Also, a gps is helpful for the shortcut shown on the map and navigate the sometimes confusing network of dirt roads. It is not easy to find the final route back to your car.


