Yosemite Falls (Upper)
| Rating: | |||||||||||||||||||||||||||||||
|---|---|---|---|---|---|---|---|---|---|---|---|---|---|---|---|---|---|---|---|---|---|---|---|---|---|---|---|---|---|---|---|
| | Difficulty:POI 4A V R (v5a1 V) Raps:4+, max ↨500ft
Red Tape:Permit required Shuttle: Vehicle:Passenger Rock type:Granite | ||||||||||||||||||||||||||||||
| Location: | |||||||||||||||||||||||||||||||
| Condition Reports: | 19 Sep 2021
"Since I had rebuilt all the headwall anchors on the previous months trip, it was smooth sailing on UYF! We also ran ME and LYF for a "casual" 12 hou |
||||||||||||||||||||||||||||||
| Best season: | Jul-Oct
|
||||||||||||||||||||||||||||||
| Regions: | |||||||||||||||||||||||||||||||
Introduction[edit]
THIS IS A BIG WALL MULTI-PITCH EXIT RAPPEL. THIS IS NOT A CANYONEERING ROUTE. The Yosemite Falls canyoneering route is named Middle Earth.
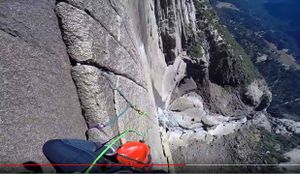
Some mountains have "climb me" written all over them. Some waterfalls have "descend me" written all over them, and Upper Yosemite Falls is one of them. The question is just how to descend a 1500 foot waterfall on an otherwise blank looking face? The horizontal extent is about 200 feet from the observation deck at the top to the pool at the bottom. And the waterfall is seasonally so powerful that even standing near the bottom is like being in a hurricane! Descending Upper Yosemite Falls safely takes serious logistical planning, proper skill set for building anchors on big walls, being able to handle long rappels, and the falls in mostly dry conditions.
Approach[edit]
This is the easy part! :) Find Yosemite Falls Trails at the back of the Camp 4 parking lot, and hike 3.6 miles up the 2700 feet gain to the observation deck with your massive amounts of rope and gear. And if you are just hiking up for the view with no gear, that's cool too. Because the view along the trail in spots, and from the various viewpoints of top is world class, especially when the water flow is way up!
Rating[edit]
If this descent were a "canyon" it would be 4A V R for the first documented descent, 12-14 October 2018.
The "A" rating is based on the conditions, which was extremely low flow over the falls, and just 2 weeks earlier it was bone dry. As such we had occasional whiffs of light spray in a few places on descent line; thus making a light rain jacket and pants sufficient to stay completely warm. In the spring the water flow could be 1000x and most of the descent line would be a torrent of powerful spray, making it crazy, insane, or even deadly to try to descend per the rappel stations listed below. Note that the water temperature varies from just above freezing in spring to 40+F (5+C) late summer. Thus any significant spray on the line means that most likely a dry-suit would be needed to stay warm. Do not underestimate the hypothermia danger of this descent!
The "4" & "R" rating stems from the rigging complexity, potential issues with "pull downs" and final 450 foot rappel anchor off a sharp horn that needs careful attention to any webbing looped around it.
The "V" rating represents the 2 nights and 3 days of the October 2018 descent, but certainly could be just one long day with a strong team.
Gear[edit]
Recommended group gear includes:
- 1x 660 foot (200m) rope
- 2x 600 foot (180m) ropes
- 1x 165 foot (50m) rope
- 1x 50 foot (15m) rope
Traditional protection (trad pro) climbing rack for building anchors with:
- Active Cams (Black Diamond sizes) 0.2, 0.3, 0.4, 0.5, 0.75 and 1
- Nuts (medium to larger size, 1/4" to 3/4" thick) about 10 of them & nut tool
- 3x Cordelette's or 5/8 webbing to build trad pro anchors
- 6x free biners and or quick links
- 6x locking biners for anchors
Natural anchor building:
- 60 feet of 1" tubular webbing
- 6x quick links
- 4x rope edge protectors
- 1x rope grab to hold one edge protector
- 50 feet of small cord for rigging edge protector
FRS radios with fresh batteries for everyone!
Recommended in addition to normal canyoneering personal gear:
- rappel device that does not twist the rope such as a caving rack, or at least a device verified to minimally twist the ropes that will be used
- adjustable safety lanyard, PAS with many loops, or climbing daisy chain; allowing secure, minimal extension to pass re-belays
- two mechanical ascenders that can be used one-handed with tethers, and preferable rigged for an efficient rope climbing system (such as a caving Frog) just in case retreat back up becomes needed
Descent Overview[edit]
Rappels and Anchors:
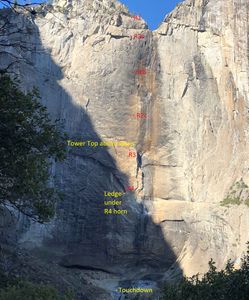
- R1 150ft + 30ft + rigging webbing fixed-line from the cedar tree West of railing, angle off plumb slightly West (RDC)
- R1alt 180ft from pine tree (webbing anchor installed OCT 2019) about 30 feet West of the railing, rappel plumb to small ledge 150 feet below railing ledge.
- R2a 230ft fixed-line from 2x5ft ledge with trad pro anchor behind 8 foot tall flake
- R2b 240ft fixed-line from small ledge/tower with trad pro (hanging station)
- R2c 200ft+15ft fixed-line from 6 inch wide ledge/tower/plate with trad pro at your feet (hanging station) to reach Oasis Ledge.
- R2d_new 15ft pull-down from 2 tiny nuts (installed AUG 2021) standing on the big boulder on Oasis Ledge. Only the last person need use this anchor.
- R3 270ft pull-down from knot chock and pinch point on East end of Oasis Ledge, angle off plumb slightly West (RDC)
- R3_alt 270ft pull-down from single bolt (installed OCT 2019) and pinch point on West end of Oasis Ledge, rappel very slightly East of plumb (LDC) over roof to horn anchor
- R3_alt_new 330ft pull-down from single bolt and pinch point on West end of Oasis Ledge, rappel a bit West of plumb (RDC) to a red stained ledge, then down to another small ledge with a 2 foot tower. (AUG 2021)
- R4 450ft pull-down from slings around large sharp horn under big arcing roof (Note: 500ft will give you wiggle room because more tail is needed to work across slab and not go into the pool)
- R4_new 370ft pull-down from a sling around the small tower. This tower has sharp edges so webbing should be padded. (also backed up with a #3 Camalot AUG 2021).
NOTE: distances are approximate!
Descent Plan of Attack[edit]
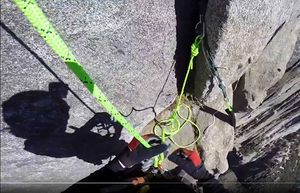
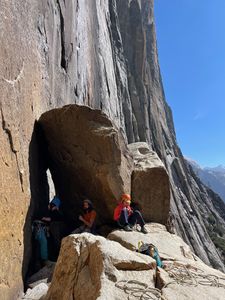
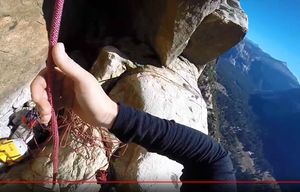
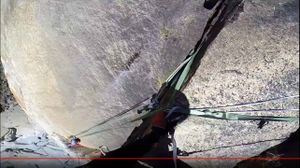
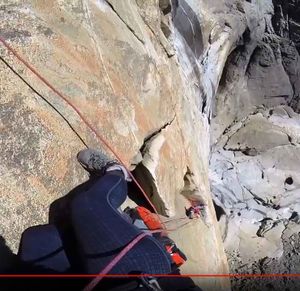
As they say "there is more than one way to skin a cat", and that's certainly true here. For the Oct 2018 descent, we rigged our ropes fixed-line the first day from the top to the bottom using the stations listed in the Descent Overview. This was done to make each rappel more reasonable length between places to actually stand on any little ledge, which eases seat harness discomfort, and allows for more people to be rappelling concurrently. And most importantly we did this to make sure that all the ropes present would reach all 1600 feet down to the deck while not having to cross a knot from a hanging position on rappel. Also, should retreat be necessary, ascending shorter sections is much less likely to chew up the rope from abrasion, since it was easy to manage rope protectors where these anchors are located and the rope bends over the ledge. And these anchors allow for multiple people to ascend concurrently too. But this does mean each subsequent person on descent had to cross each of the intermediate anchors (R2a, R2b, R2c) using the standard caving re-belay technique. On the second day, all of the R2 trad pro anchors were removed by the last person down, so this person was always rappelling off the R1 anchor (tree at top) with the R1 rope tied to the R2 rope, totaling over 800 feet of rope. This allowed for all the trad pro to be removed. Once the rappel party was all safely on the massive Oasis Ledge (top of R3) then the rope tender group (at the cedar tree up top) pulled up both R1 and R2 ropes, pack them up, and hiked down the the approach trail. Side note: the Oasis Ledge is totally safe for at least a dozen people to be there off-rope in a non-exposed position. Then the rappel group on the Oasis Ledge completed the last two rappels as pull downs with 2x 600 foot ropes, using one rope for R3 and both ropes for R4.
Note that for the Oct 2018 descent we used a 150 foot rope for R1 that was extended up top 20 feet from the tree, a 600 foot rope for R2 that was 40 feet short of the Oasis Ledge Tower (first place to stand 10 feet above the Oasis ledge) so it was extended with another 80 foot rope. Thus the recommendation for a 165 foot for R1 and a 660 foot for R2 should be plenty to make Oasis Ledge (top of R3). But just in case have an extra 50 feet of rope handy to be sure and make Oasis Ledge without having to connect one of the recommended 2x other 600 foot ropes.
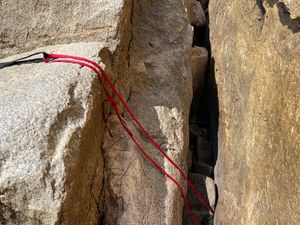
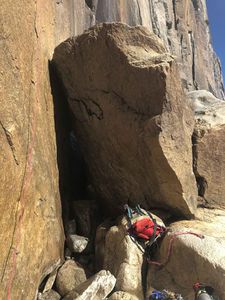
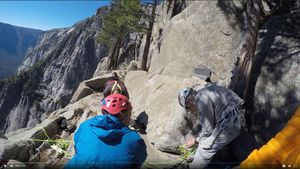
It might be tempting to do R2 as a 660 foot pull-down rappel, but given the that the Oasis ledge is actually a large plate system, and with all the wind typically present, the chance of the 660 foot rope piling up out of reach behind large flakes or on the opposite side of the Oasis Ledge Tower (see pic below of blocks making this tower) is extremely high. Thus this is not recommended. However, if all the trad anchors are left in place and all the intermediate R2 anchors are used as pull-down rappels, then the last one at ~200 feet is manageable. Still the last person down needs to stop on the Oasis Ledge Tower and do the pull down from there to be sure and retrieve the falling rope side should it go on the opposite side of the tower. Then that last person down will have to down climb the 10 feet of flaring chimney (partner assist workable here) or rappel off another built anchor to reach the Oasis ledge (see pic).
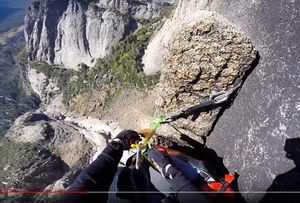
The R3 anchor on Oasis Ledge was constructed with nice pinch point and a solid knot chock, both extended a bit over the edge so the pull from small ledge at R4 is easy. The wall is smooth, so there should not be any pull-down issues. The R4 anchor was constructed with several slings around a large horn with sharp edges. The anchor could be improved by filing / bashing / grinding off the sharp rock edges a bit and or adding additional large trad pro to the crack adjacent to the horn. This anchor is also about 20 feet above the only small ledge below that allows for one person to comfortably stand. We extended the webbing so the block was easily within reach standing on the ledge, after the first person down rigged the last rope fixed off the anchor directly. Also, just before R4 goes free (some 350 feet) one member reported a sharp horizontal edge, so a rope protector held with a easy to remove and install rope grab would be useful. We did not install a rope protector here, and did not note any rope abrasion afterwards, but just in case, it's a good idea.
Another goal of the Oct 2018 descent was to establish a line where each rappel is true plumb, instead of having to pendulum off plumb. There are 2 exceptions to this for R1 and R3 (as noted in the descent overview) in that both rappel are slightly to the West, RDC, or to rappeller left (facing the wall) in order to reach the next anchor point. Both of these anchors could be easily reset to make them true plumb For R1 there is another pine tree further West (see pic) that most likely would be true plumb with the R2a ledge. Similarly, an alternate R3 anchor could be build on the Oasis Ledge which would be true plumb to the R4 anchor. Going slightly off plumb was no issue with dry granite, but with more water flow, the granite will be slippery, and thus the closer to true plumb the easier it will be to get from anchor to anchor.
Descent Development[edit]
If bolted stations were installed, this descent would be far easier to do. However, given that all the bolts would be hand drilled if done legally, this is a extremely time consuming task. Removable trad rock pro and standard "natural" webbing anchors work very well here, and the spacing is totally workable. As such, I feel this descent should not bolted, because installing and using natural and trad rock pro anchors makes the journey even more challenging, adding a level of fun that I think should be enjoyed by future parties, not diminished by installing lots of bolts. Maybe breaking up the last rappel with one bolted station right where it goes free would be nice. Anyway, my two cents worth.
Exit[edit]
After touchdown on 450 foot R4 (the last rappel), pendulum over West on the slab using extra rope (thus 500 recommended) to avoid going into the big pool. Once the first person is down, the rope end can be anchored off to the side to make it easier each person down to pull off plumb and avoid the pool. With the water flow up, the whole area will be wet with spray, and so going into the pool may be the only realistic option. Of course in such wet conditions, the whole party will be using full body wetsuits and or drysuits, so it likely will not matter to go swimming at the end. Getting out of the pool on the pour-over side looks easy enough but has not been verified. With significant water flow, this may require some ground base rope work and a throw line to assist with safe pool exit.
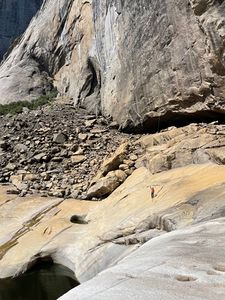
Once away from the slick slabs, cross the boulder field to the West back to the main Yosemite Falls trail. Note that the boulder field can be quite slick with water spray when the water flow is up. In very low flow, the slabs and boulder field are totally dry and trivial to cross. Also, under very low flow it's easy enough to traverse under the waterfall to the East, hike down to the last Rappel of Middle Earth (may need a rappel to get to the last rappel) and do the 400+ foot Lower Yosemite Falls rappel in one shot. And for those with time to burn and already dressed to kill (wetsuit / drysuit), do Middle Earth as a bonus canyon exit! :)
Red tape[edit]
A backcountry camping permit is required if doing any normal overnight camping up top or for bivy'ing on the wall itself:
https://www.nps.gov/yose/planyourvisit/climbingpermits.htm
Beta sites[edit]
NPS webcam for checking the waterflow: https://www.nps.gov/yose/learn/photosmultimedia/webcams.htm
Trip reports and media[edit]
FIRST DESCENT TRIP: Photo album of Oct 2018 descent: https://www.facebook.com/scott.swaney/media_set?set=a.10156801456582930&type=3
Short video of the Oct 2018 descent:
https://www.youtube.com/watch?v=FHisifBUthI&feature=youtu.be&fbclid=IwAR1Atv67RIsilEh8IY0x3vmeJ4XUqUAXf5zR2DU9rpJ1Gis3YUxNeknEE30
Scott's FB Trip Report - First Descent on 10-13-18:
https://www.facebook.com/668617929/posts/10156794688342930/?comment_id=10156800525212930
Background[edit]
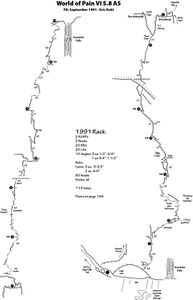
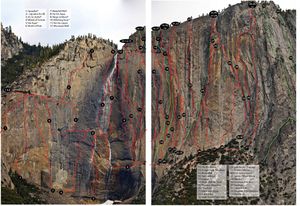
This big wall climbing site has info on Oasis Ledge as well as the closest climbing line ("World of Pain" FA 1991) to the Oct 2018 descent line: http://www.yosemitebigwall.com/yosemite-falls-wall?fbclid=IwAR1z2c7SRp7vBwoDLUBQDCzqxokH24w1I3w_fOifYtdx431XTQH2OffzvEU

