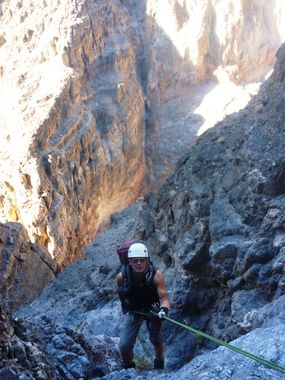
Hobbit Canyon
| Rating: | |||||||||||||||||||||||||||||||
|---|---|---|---|---|---|---|---|---|---|---|---|---|---|---|---|---|---|---|---|---|---|---|---|---|---|---|---|---|---|---|---|
| | Difficulty:3A II (v3a1 II) Raps:6, max ↨180ft
Red Tape:No permit required Shuttle:None Vehicle:High Clearance Rock type:Carnivorous limestone | ||||||||||||||||||||||||||||||
| Start: | |||||||||||||||||||||||||||||||
| Parking: | |||||||||||||||||||||||||||||||
| Condition Reports: | 14 Mar 2025
"We took a very long time on this canyon because Im recovering from Achilles tendon/bone spur surgery, and dont have strength or stabilizing muscles |
||||||||||||||||||||||||||||||
| Best season: | Winter
|
||||||||||||||||||||||||||||||
| Regions: | |||||||||||||||||||||||||||||||
Introduction[edit]
Hobbit is a short but engaging canyon. It is not a destination in itself, but is a good second canyon after doing another canyon in the area. Allow enough time to run the canyon as it is not a trivial romp. Even though it's short, it is not suitable for a team without a few experienced canyoneers.
Approach[edit]
From North Highway, drive up the exit of Titus Canyon to the end of the two-way section of road. Park by the vault toilet at the bottom of the one-way section of Titus Canyon. This road "can" be done by a sedan, but you will have less stress if you have a high-clearance vehicle.
If only doing this canyon (not as a second canyon after another one that exits to Fall Canyon), then it makes more sense to take the primary approach track. Walk a short distance on the trail toward Fall Canyon, then veer toward mountains and start your climb.
If you are doing Hobbit after doing another canyon in the area, you can shortcut your route back up by taking the alternate approach shown. This is about 800' of acescent up a gully filled with very sharp limestone rocks. If you're starting from the parking lot, do the main approach: it's much more pleasant.
Descent[edit]
Canyon narrows to a slot. A couple 10-foot spicy downclimbs lead immediately to the first rappel.
R1 (less than 50') is anchored from a pinch point. Highly recommend using enough rope to not have to rig R2 separately. This will save you time, and eliminate a very awkward rappel start on R2. There are many loose rocks under the chockstone on R1, which you will risk dropping on any teammates that are rigging or rappelling R2.
R2 (about 50') anchored from a chocked rock in the canyon floor. You will want to be on rope from R1 while checking this anchor. Starting this rappel requires you to get on rope, then chimney out and down until you are below the anchor point. Newbies won't like it.
Several downclimbs
R3 (80 feet) anchored from two small cemented rock horns on right wall. The canyon opens up on this rappel.
R4 (80 feet) anchored from a large rock with some sharp edges. Most of this rappel down a sloped wall with ledges can be downclimbed.
Downclimb
Optional R5 (20 feet) anchored with a pinch point.
R6 (150-180 feet), anchored from a pinch. Consider replacing webbing due to wear on the abrasive rock that the webbing stretches across. This rappel is a series of slopes and chimneys. Most, or maybe all, of it can be downclimbed. The watercourse for R6 turns DCL, with topology that makes a rope pull complex. A chockstone hanging in the final chute can trap a falling rope, so whipping the pull (or both the pull line and the rappel rope if toggling) is recommended.
Now you are in Fall Canyon
Exit[edit]
Follow the hiker's route to the Titus Canyon trailhead.
Red tape[edit]
https://www.nps.gov/deva/planyourvisit/canyoneer.htm
No overnight sleeping is allowed at this trailhead.
Beta sites[edit]
 Super Amazing Map : Hobbit
Trip reports and media[edit]
First Descent trip report - 1-18-14:
Background[edit]
Originally explored by Scott Swaney & team on 01-18-14.
