Waterfall of Moss
Jump to navigation
Jump to search
| Rating: | |||||||||||||||||||||||||||||||
|---|---|---|---|---|---|---|---|---|---|---|---|---|---|---|---|---|---|---|---|---|---|---|---|---|---|---|---|---|---|---|---|
| | Difficulty:3A (v2a1 II) Raps:8-9, max ↨52ft
Red Tape:No permit required Shuttle:None Vehicle:Passenger Rock type:Sandstone | ||||||||||||||||||||||||||||||
| Start: | |||||||||||||||||||||||||||||||
| Parking: | |||||||||||||||||||||||||||||||
| Condition Reports: | |||||||||||||||||||||||||||||||
| Best season: | Jan-Dec, BEST Oct-April
|
||||||||||||||||||||||||||||||
| Regions: | |||||||||||||||||||||||||||||||
Introduction
An easy canyon with little to no flow in normal conditions.
Good option to tack onto Whungee Wheengee (WW) since the WW exits from the Wollangambe 2 exit track and at this point you're only approx 420m away (and ~80m elevation gain) from the start of Waterfall of Moss.
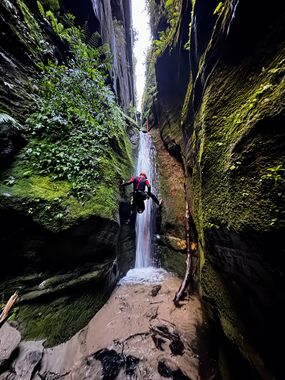
Banner photo: Last abseil in higher than normal flow (taken 24 hours after a substantial amount of rain ~200mm in 1 day)
Approach
- Start at Cathedral of Ferns campground (northern end)
- Make your way along the Wollangambe 2 canyon exit track to the Wollangambe River
- Swim across the Wollangambe to the small beach on the other side
- Climb up the gully, involves small 4m climb at the start (there is usually a hand line hanging down)
- Follow the faint "goat track" up... if you're climbing/cliffed out you're on the wrong route
- Enter at approx -33.47652, 150.38579
Descent
Notes
- 8-9 abseils
- None longer than 16m
- Normally very low flow (trickle) or can be dry i.e. Aquatic grade 1
- Pools at the bottom of each abseil are shallow (ankle to knee depending on your landing)
- Wetsuits are optional... but you have to swim across the Wollangambe to access the canyon
- Better after some rain
Problems
| Number | Type | Length | Anchor | Location | Notes |
|---|---|---|---|---|---|
| 1 | Abseil | 9m | Sling on tree | River left | |
| 2 | Abseil | 10m | Sling on tree | River left | |
| 3a | Abseil | 15m | Bolts | River left | Problem 3 can be be split into two using anchor 3b half way down |
| 3b | Abseil | 10m | Sling on tree | River left | Optional if bypassing using Problem 3a anchor |
| 4 | Abseil | 16m | Sling on tree | River right | |
| 5 | Abseil | 8m | Sling on tree | River right | |
| 6 | Abseil | 10m | Sling on board | River left | |
| 7 | Abseil | 11m | Bolts | River left | |
| 8 | Abseil | 10m | Bolts | River left |
Photos
Exit
- Swim down the Wollangambe to the Wollangambe 2 exit
- Exit via the Wollangambe 2 exit track


